Operating navigation
Starting navigation
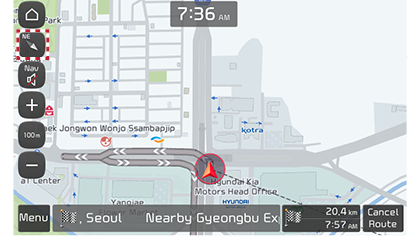
Press [MAP] on the head unit to show the current vehicle location and the map of the surrounding area.
Current location
Press [MAP] on the head unit to show the vehicle's current location (vehicle location mark) and the map of the surrounding area.
Changing map view
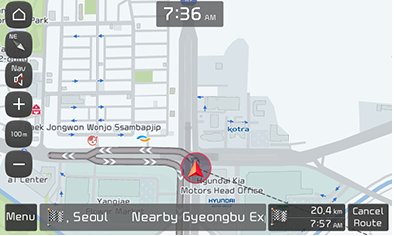
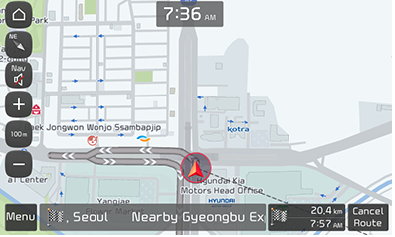
Displays the map based on the vehicle direction or the north direction.
You can change the map view by pressing [![]() ]/[
]/[![]() ]/[
]/[![]() ] on the map screen.
] on the map screen.
|
|
- [
 ]: Show the driving direction in 2D. (The vehicle’s driving direction always points upward.)
 - [
 ]: Show the driving direction in 3D. (Displays buildings and other items in 3D.)
 - [
 ]: Fixed map in 2D. (The north direction is always the top of the screen regardless of the vehicle’s driving direction.)
Adjusting navigation volume
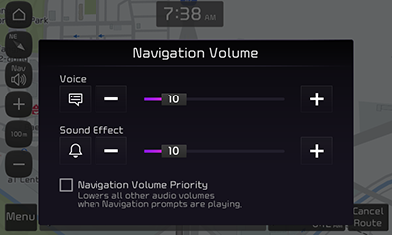
Set the voice guide volume of the navigation.
- Press [
 ] on the map screen.
|
|
- Select an item and adjust the volume.
- Press [
 ]/[
]/[ ] to control the volume.
 - [
 ]: Start voice guide.
 - [Voice]: The volume control bar allows you to adjust the voice guide volume.
- [Sound Effect]: The volume control bar allows you to adjust the sound effects volume.
- [
 ]: Stop voice guide.
 - [
 ]: The volume control bar allows you to adjust the volume.
 - [Navigation Volume Priority]: Select the checkbox to make the voice guide volume higher than the audio volume.
Changing map scale
Changing map scale manually
You can change the map scale by pressing [![]() ]/[
]/[![]() ] on the map screen.
] on the map screen.
|
|
|
,Reference |
|
Changing map scale automatically
You can enable or disable automatic map scaling according to the vehicle speed.
Press [![]() /
/![]() ] on the map screen.
] on the map screen.
|
|
- [
 ] (Enabled): Fixed scale. (Press [
 ]/[
]/[ ] to change the scale as desired.)
 - [
 ] (Disabled): Automatic scale. (The scale changes based on the current vehicle speed.)
Previous destinations / Freq. visited points
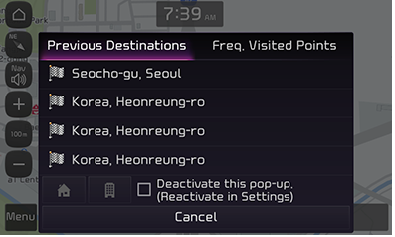
When you start the navigation, the "previous destinations/frequent destinations" pop-up window appears for approximately 10 seconds. Select a destination and click [Start Guidance] to start the GPS guidance. (The window appears only when there is no route set.)
|
|
|
,Reference |
|
In “Navigation settings”go to [Others] > [Previous Destinations Settings] > [Show Previous Destinaton after Navigation Start-Up] to turn off the previous destinations display. |
Search route
Even after a route has been set, you can use the different route options and set a new route.
Reroute
Find a new route to the currently set destination.
Press [![]() ] > [Route] > [Reroute] on the map screen.
] > [Route] > [Reroute] on the map screen.
Route options
You can change various route options to find a new route to the currently set destination.
- Press [
 ] > [Route] > [Route Options] on the map screen.
 - Refer to "Route options” for details.
Searching for nearby facilities
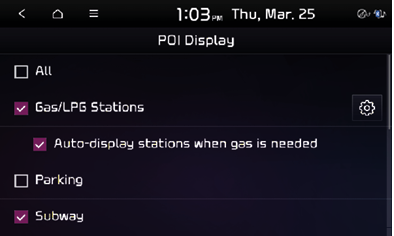
Showing and hiding nearby facility category icon on the map screen
- Press [
 ] > [Nearby POIs] > [POI Display] on the map screen.
|
|
- Check the desired options to display the corresponding nearby facility category icons on the map.
Searching facilities
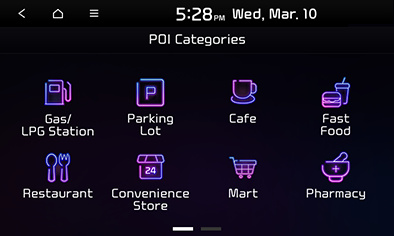
You can search for facilities around the route, current location, destination or selected location and also within a selected area.
- Press [
 ] > [Nearby POIs] > [POI Categories] on the map screen.
|
|
- Select a nearby facility category.
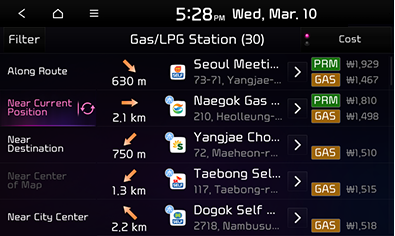
(EX: Gas/ LPG Station)
|
|
- For each category, you can press [Distance], [Best Match] or [Cost] to sort the items accordingly.
- Select a desired item on the list.
|
|
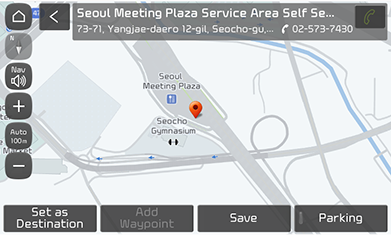
- Press [Set as Destination].
- Press [Change Destination] to set a different destination if there is an existing route set.
- Press [Add Waypoint] to add a waypoint after setting the destination. Refer to “Adding waypoints” for follow-up actions.
- To save the currently selected location, press [Save] and select the desired group. Press [NAV] > [Saved Place] to view the saved locations.
- Press [V] to make a phone call. If no phone number is saved or bluetooth is not connected, the call is not available.
- Press [Parking] to display or hide the parking lot icons among the nearby facilities.
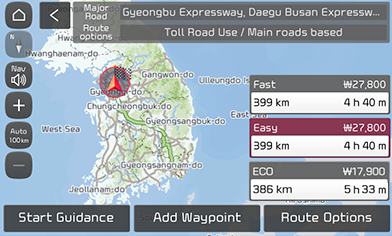
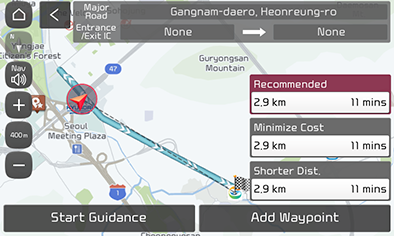
- Press the desired route.
|
|
- [Fast]: Provides a fast route using traffic information.
- [Easy]: Provides the most optimal route considering distance and cost in addition to traffic information.
- [ECO]: Provides the route with the minimum use of toll roads in addition to traffic information.
|
|
- [Recommended]: Provides the route that takes the least time to the destination.
- [Minimize Cost]: Provides the route with the minimum use of toll roads.
- [Shorter Dist.]: Provides the shortest route to the destination.
- Press [Start Guidance].
Saving current location
You can save the current vehicle location.
- Press [
 ] > [Save] on the map screen.
|
|
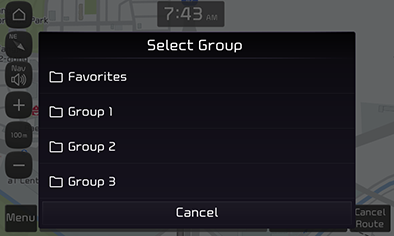
- You can select a group to save the current location.
|
,Reference |
|
Press [NAV] > [Saved Place] to view the saved locations. |
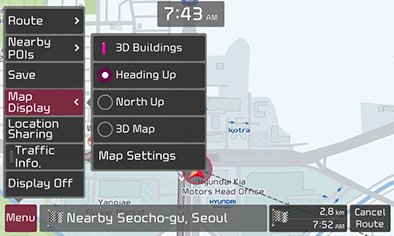
Map display
Displays the map based on the vehicle direction or the north direction.
- Press [
 ] > [Map Display] on the map screen.
|
|
- Select a desired option.
- [3D Buildings]: Shows or hide buildings.
- [Heading Up]: Show the driving direction in 2D. (The vehicle’s driving direction always points upward.)
- [North UP]: Fixed map in 2D. (The north direction is always the top of the screen regardless of the vehicle’s driving direction.)
- [3D Map]: Show the driving direction in 3D. (Displays buildings and other items in 3D.)
- [MAP Settings]: Move to the map settings screen.
Saving/editing/deleting locations
If you save locations in advance, it is more convenient when setting the destination. You can also edit or delete the saved locations.
Saving home, work, favorite 1-4
You can save locations as home, Office or frequently visited locations.
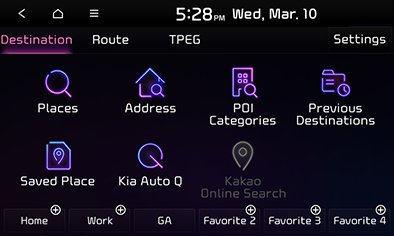
- Press the [NAV] button.
|
|
- Press [Home], [Work], [Favorite 1-4].
- Use the search feature to set home, work, Favorite 1-4.
- When the setting is complete, press [Done].
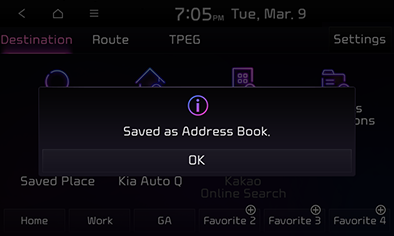
- Click [OK] in the pop-up.
|
<Example of saving home> |
|
,Reference |
|
Editing saved home, work, favorite 1-4
- Press [NAV] > [Saved Place] > [Favorite].
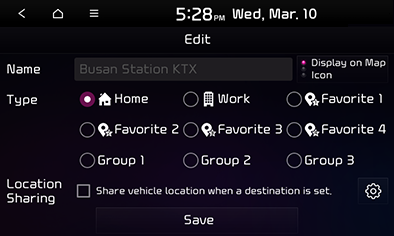
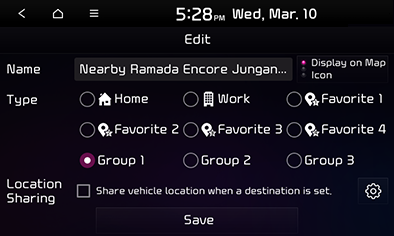
- Press [Edit] for the item to edit.
- Select and edit the desired item.
|
|
- [Name]: Edit the name, then press [Save].
- Map icons: Set the symbols to display on the map. Set [Display on Map Icon], [Display on Map Icon & Name] and [Display on Map None].
- [Type]: Select the category in which the location will be saved.
- [Location Sharing]: When the destination is set, share the vehicle's location with the saved contact.
- Press [Save] to complete the setting or return to the previous screen.
Registering registered locations
You can save frequented locations.
- Press [NAV] > [Saved Place].
- Select a group. Press [Group 1], [Group 2] or [Group 3]. If there are no saved locations, a pop-up appears. Press [OK].
- Press [Add].
- Find the desired location by using search feature and save it.
- When setting is complete, press [Done].
|
,Reference |
|
Refer to “Setting destination by saved locations search” to set a saved location as the destination. |
Editing saved locations
- Press [NAV] > [Saved Place].
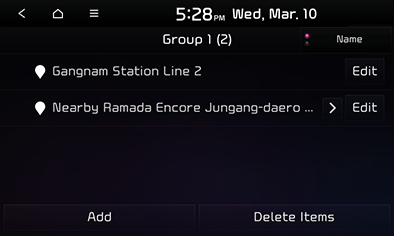
- Select a group you want. (example: Group 1)
- Press [Edit] for the saved location to edit.
- Select and edit the desired item.
|
|
- [Name]: Edit the name, then press [Save].
- Map icons: Set the symbols to display on the map. Set [Display on Map Icon], [Display on Map Icon & Name], and [Display on Map None].
- [Type]: Select the category in which the location will be saved.
- [Location Sharing]: When the destination is set, share the vehicle's location with the saved contact.
- Press [Save] to complete the setting or return to the previous screen.
Sorting saved locations
- Press [NAV] > [Saved Place].
- Select a group you want. (example: Group 1)
- Press [Name] or [Date].
|
|
- [Date]: Sort the locations in the order of saved date.
- [Name]: Sort the locations in the alphabetical order.
- Press [
 ] to complete the setting or return to the previous screen.
Renaming saved location groups
- Press [NAV] > [Saved Place].
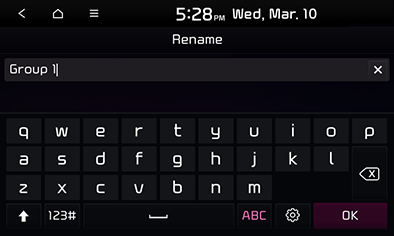
- Press [Rename] for the desired group.
- Change the group name and press [OK].
|
|
- Press [NAV] > [Saved Place].
- Select a group you want. (example: Group 1)
- Press [Delete Items].
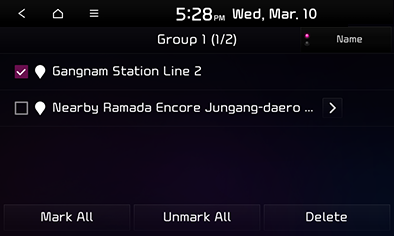
- Select the item to delete, then press [Delete].
|
|
- To select the entire items, press [Mark All].
- To deselect the entire selected items on the list, press [Unmark All].
Managing saved locations
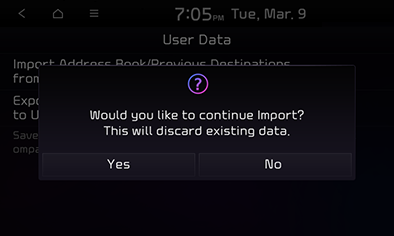
Import address book/previous destinatons from USB device
This feature is used to import locations saved in a USB drive.
- Connect a USB memory to the USB port.
- Press [SETUP] > [Navigation] > [Others] > [User Data] > [Import Saved Places/Previous Destination from USB Device].
|
|
- Press [Yes].
- Press [OK].
Press [View] to view the imported locations.
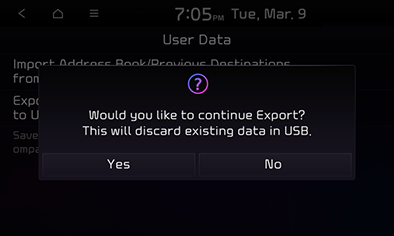
Export address book/previous destinatons to USB device
This feature is used to export locations to a USB device.
- Connect the USB device to the USB port.
- Press [SETUP] > [Navigation] > [Others] > [User Data] > [Export Saved Places/Previous destination to USB Device].
|
|
- Press [Yes].
|
,Reference |
|
|
,Reference |
|
